Modelling Process Part 2 – The Pelvis and Torso | Development

Intended Outcome:

  • Create a pelvis for my creature.
  • Create the torso for my creature.
  • Use other techniques past the sculpt tool to define the torso.

Problems I encountered and how I overcame them:

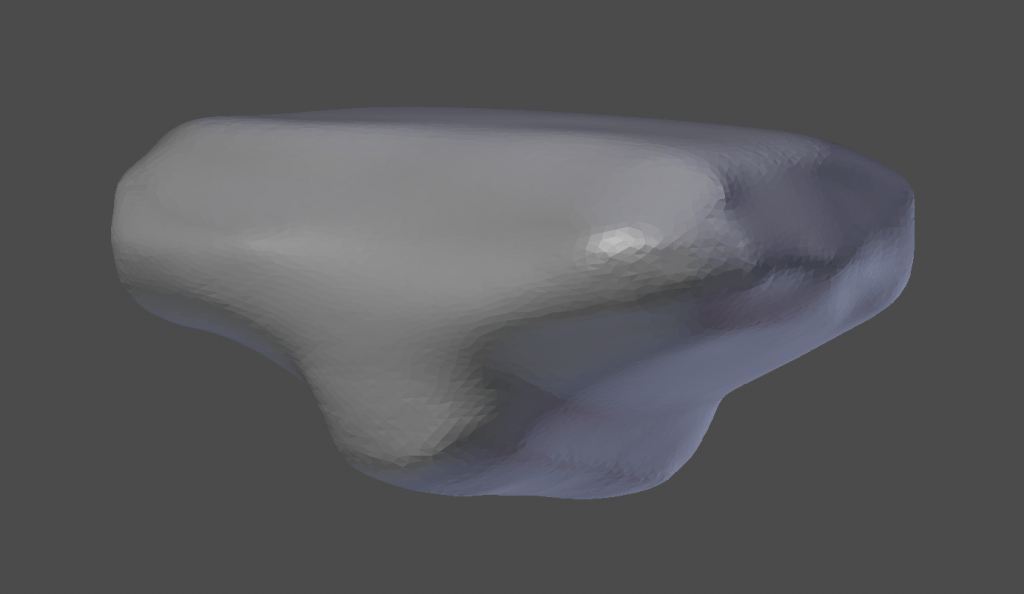
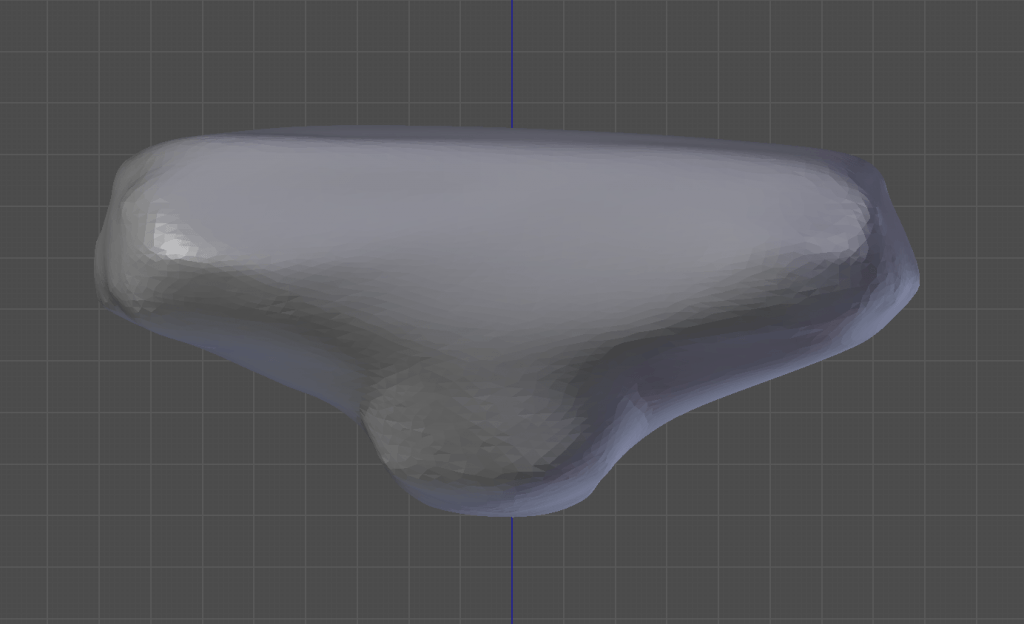
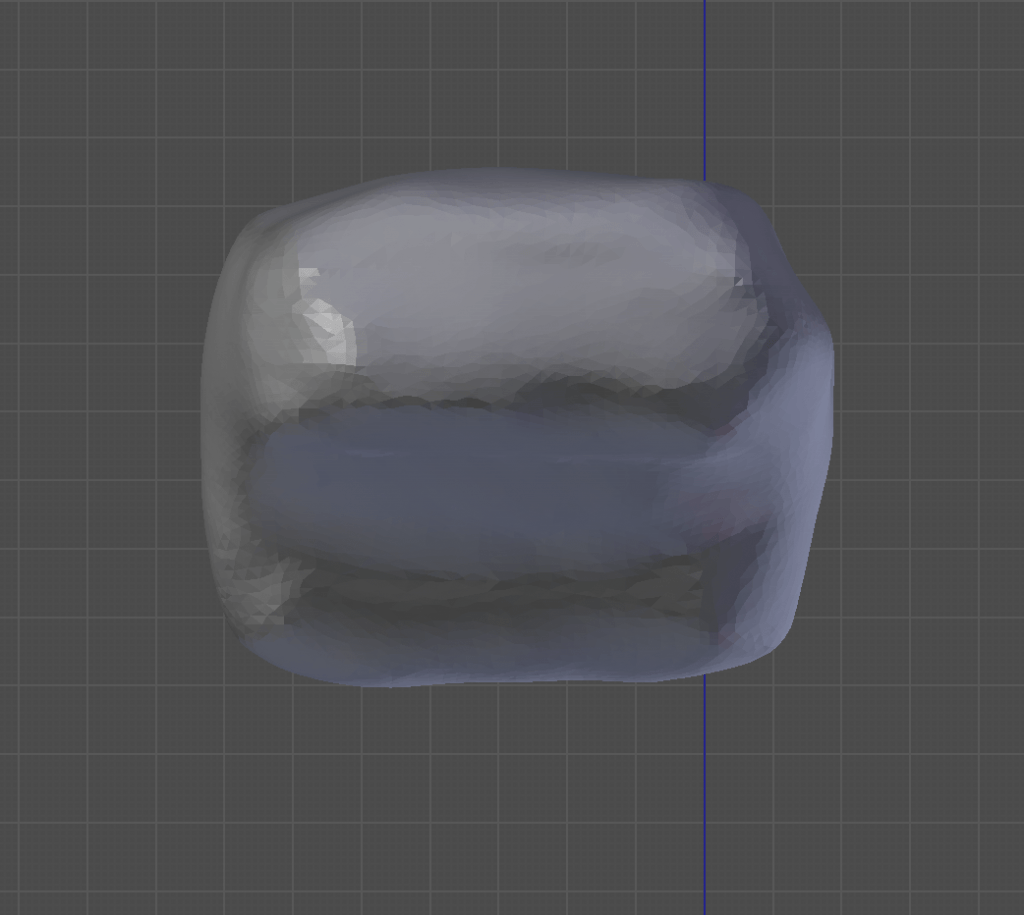
  • During this modelling session, I chose to try and use the Boolean modifier to create divots in the pelvis where the legs are going to go. Whilst the end result proves this was a good decision, I found it difficult to use the modifier, despite being comfortable with the way it worked. I was originally tempted to try making this part by creating loop cuts in the side of the initial cube, splitting the mesh in half, then extruding the top part as I saw fit, but thought this would create a more complicated mesh, something that can be avoided completely with the Boolean modifier. The difficulty i found with this modifier was choosing which operation to apply, as well as which object to apply that operation to. Once I overcame this confusion and became familiar with the tool, however, I was able to create the result I had hoped.

Crotch 1 Crotch 2 Crotch 3

  • When I began on the Torso, I realised I needed more practice in the basic functions Blender has to offer. I attempted to create the correct shape a few times, firstly trying the indent function, but I failed to make a mesh that was easy to work with, therefore I chose to leave this until I had experimented more with the functions I needed to use to make the process easier and more efficient. Once I had decided this, I experimented more with the boolean tool again, choosing to use the union option to create the shoulders and see what happened. Because I was not accurately scaling and sizing the objects, the result was very warped, however it did help me to understand the Boolean.

Where to go from here:

  • Begin on the smaller and simpler components to my creature.
  • Revise the basics of Blender again.

Modelling Process Part 1 – The Head | Development

After finalising my 2D designs, It was time to begin modelling my character in Blender. My instinct was to begin with the head, here is my evidence and what I encountered during the modelling process.

Intended Outcome:

  • Have a completed head for my creature.
  • Become familiar with the ‘Sculpt’ mode in Blender.
  • Use the ‘Boolean’ modifier to create eye sockets.
  • Apply tools and tips I have learnt in previous experiments and tutorials.

First attempt:

I tried to begin modelling my character before I had done any detailed research and experimenting within Blender, and I was only familiar with basic tools. Because of this, my first attempt at modelling the head failed, as I could not gain the look I was hoping for. It was after this I decided to look into creating natural elements in Blender, and conducted the research shown in my ‘Creating Rocks in Blender’ research post. Here is a time-lapse of my first attempt, showing the struggles I faced.

Final Attempt:

After conducting research I became slightly more confident in when modelling. I was introduced to the sculpt tool which really helped me to create a natural looking form. Here is a time-lapse of my process.

Problems I encountered and how I overcame them:

  • Shaping the head proved harder than I had anticipated. Although my character is made of natural elements such as rock and/or sand and therefore gave me an excuse not to be uniform, creating a surface on which the creatures face would look equal took a few different sculpting tools to perfect.
  • I struggled to use the ‘Boolean’ tool to create natural looking eye sockets. To counteract this, I searched through the different sculpting tools and tested one called ‘Inflate/Deflate’. This left the effect I was struggling to get from a Boolean, allowing me to manipulate the sockets into similar yet non-identical eyes.

Where to go from here:

  • Begin modelling the torso and pelvis of my creature.
  • Seek further advice on using the sculpt tool to ease modelling.
  • Experiment past the sculpt tool, so not to limit what I work with within Blender.

Camera Mapping in Blender | Research

As I am hoping to apply my final 3D model to different backgrounds and environments, I began to think about how I wanted to create an appropriate output. One main output I shall be creating is still images, however along side this, it would benefit both me and my project to have a slight animation to my final piece to bring the model to life.

On Youtube, Blender Guru uploaded a tutorial on how to camera map a still image in Blender and create a moving picture as opposed to having a still image. I followed this tutorial to learn the basics.

My Time-lapse

The image we camera mapped in this tutorial was a simple example, with structure and elements that made creating realism rather easy. Because my model will be based in outdoor environments, ones with less symmetry, I may need to consider other tutorials and means of learning how to effectively create the scene I hope to.

I followed the main instructions in the tutorial, but refrained from adding too much detail. I was confident in the skills I had learnt throughout this tutorial that when I come to creating my own scene in Blender, I will be able to include more detail where needed to make the scene seem more realistic. Although the tutorial was helpful in the most part, he assumed this watching were more advanced than I was, so it took me longer than I expected to finish it. I relied heavily on google searches for things I couldn’t quite fix, such as having some material Nodes greyed out because I was not in the Cycles render engine, and when I missed parts of the tutorial I would have to rewind and watch again.

In the tutorial, Blender Guru mentions adding particles in his scene to add to the realism. I have not yet experimented with this function within Blender, and aim to experiment with adding things like this in the near future.
The Final Product

My final product was not as clear and precise as the tutorials, however I am rather satisfied with the result having come from a place of complete lack of knowledge with this tool. When I experiment further with this function, I will be sure to include a lot more detail.


Sources:

Guru, B. (2017). Available at: https://youtu.be/B9r9tKX5olY [Accessed 13 Nov. 2017].

The Rigid Body Function | Research

During one of my tutorial sessions, my tutor introduced a feature of Blender where you can add animations and effects to the 3D model you are working on. The following footage is a time-lapse of my experiments when using this function.

Towards the end of this tutorial, we were encouraged to play around with the rigid body options and see where we got. I decided to set myself the task of creating a flag, however, I did not have enough knowledge about the modifier to problem solve my way to a final project. Had I had time, I would have liked to have brought this up with my tutor during the session, but for now, I intend to follow online advice and experiment during my modelling process.

Creating Rocks in Blender | Research

Whilst experimenting with Blender, I discovered a difficulty when beginning to model. One thing I had not yet tackled was creating something irregular, such as natural rock. My creature will be blending into multiple environments, so it seems only appropriate to have their material be earth-like.

To tackle this, I took advice from the following tutorials on how to create a low-poly rock in Blender. Doing this helped me to randomise things I have modelled a bit more, making them seem less uniform.

Here is a time lapse of my experiments.

This tutorial introduced me to the idea of using the sculpt tool to create detail in the rocks that didn’t look uniform. When modelling in Blender, it is quite hard to be tempted away from using modifiers such as the Boolean and Subdividers to make things uniform, however because my creature is going to be made out of all natural materials, it is interesting to work with a tool in blender that gives me that freedom.

Not only did the above outcome lead to a more in-depth knowledge of the sculpt tool, but I was also shown how to use the material node option in blender to create realistic textures and surfaces to my models. Whilst this was done on  smaller and what would most likely be a more random background asset, I had not before seen this function in too much detail. Whilst I do intend to use Substance painter, I may be encouraged to dive deeper into what blender has to offer in the texturing of my project.

Sources:

Alexandrov, G. (2017). Sculpting stone in Blender with Dynamic Topology. Available at: https://youtu.be/sl5EvG4x-bM [Accessed 13 Nov. 2017].

Geek, CG. (2017). Available at: https://www.youtube.com/watch?time_continue=2&v=xRDFMYfsIcU [Accessed 13 Nov. 2017].