My Showreel | Final

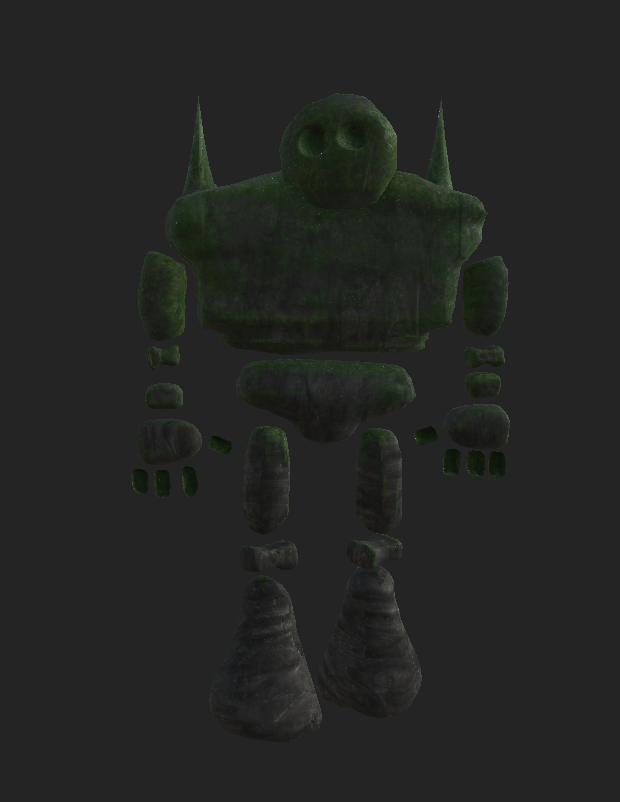
A showreel showcasing a 3D model that has been composited into different environments, texture painted and posed appropriately.
Programs Used:
Blender
Substance Painter
Adobe Premier Pro

Credits:
Images:
Cristiana Bardeanu – Snow – https://www.flickr.com/photos/cristiana-bard/15853281933/in/photolist-q9Udp8-8YeDya-5PxF33-7ma9NK-pGgFVS-qWpSzS-5w2uTB-dNo8wT-97y36A-iw8MMh-bozNsD-dRvMEt-mPSPGB-jZyPXr-qh1hUn-Fu2b4W-jmGRmW-bFa5g-HjeReu-4DqhgA-e2jRUK-21m1avy-7owQ7N-e5Pko2-bya5vz-dVs1cX-dWu2YJ-9gp85f-rKnz4U-reks7z-957kPr-22gyLaQ-7AVLQR-eLGyzN-9pA7tJ-q8rMdV-7owMgU-bfxQWD-8X1Gzg-7ShsMA-8XyEYB-n5v6fU-7EetXW-aAyJfq-nQz7ik-bq3peF-5HWbyG-dKK6jN-qpjQco-dU4pDw

Free-Photos – Trees – https://pixabay.com/en/trees-forest-sunlight-woods-1030981/

Andym5855 – Sunset – https://www.flickr.com/photos/andym5855/16043493809/in/photolist-qrH6Le-9Em3YW-edYqb7-rojCtm-cuvkNb-dzutYb-aEgZ6F-aAiFss-bhyLFK-9DYj3a-aAfXwK-aAiD9C-212n2uL-5dgTxP-cKM7Ss-ffp96m-qZWHvW-d5UPAq-a8D1wH-nkg5q5-89v4oA-iq7Ay-cp6uV9-boZ5cs-ddSto9-aAg1ei-ab586g-c3wNau-a4Lu7u-ahnmha-9bGM1o-oQCY1v-75tR-cevWHw-8AjLa-riCueu-r7c2YL-ofcJHM-dt9EQX-4wCGLS-gs8FKY-r9PAmS-5ZMuqm-cJJpwN-WSujmg-Zaf2PY-6AEWbK-NgVcfK-YNcaC2-dzp3r6/

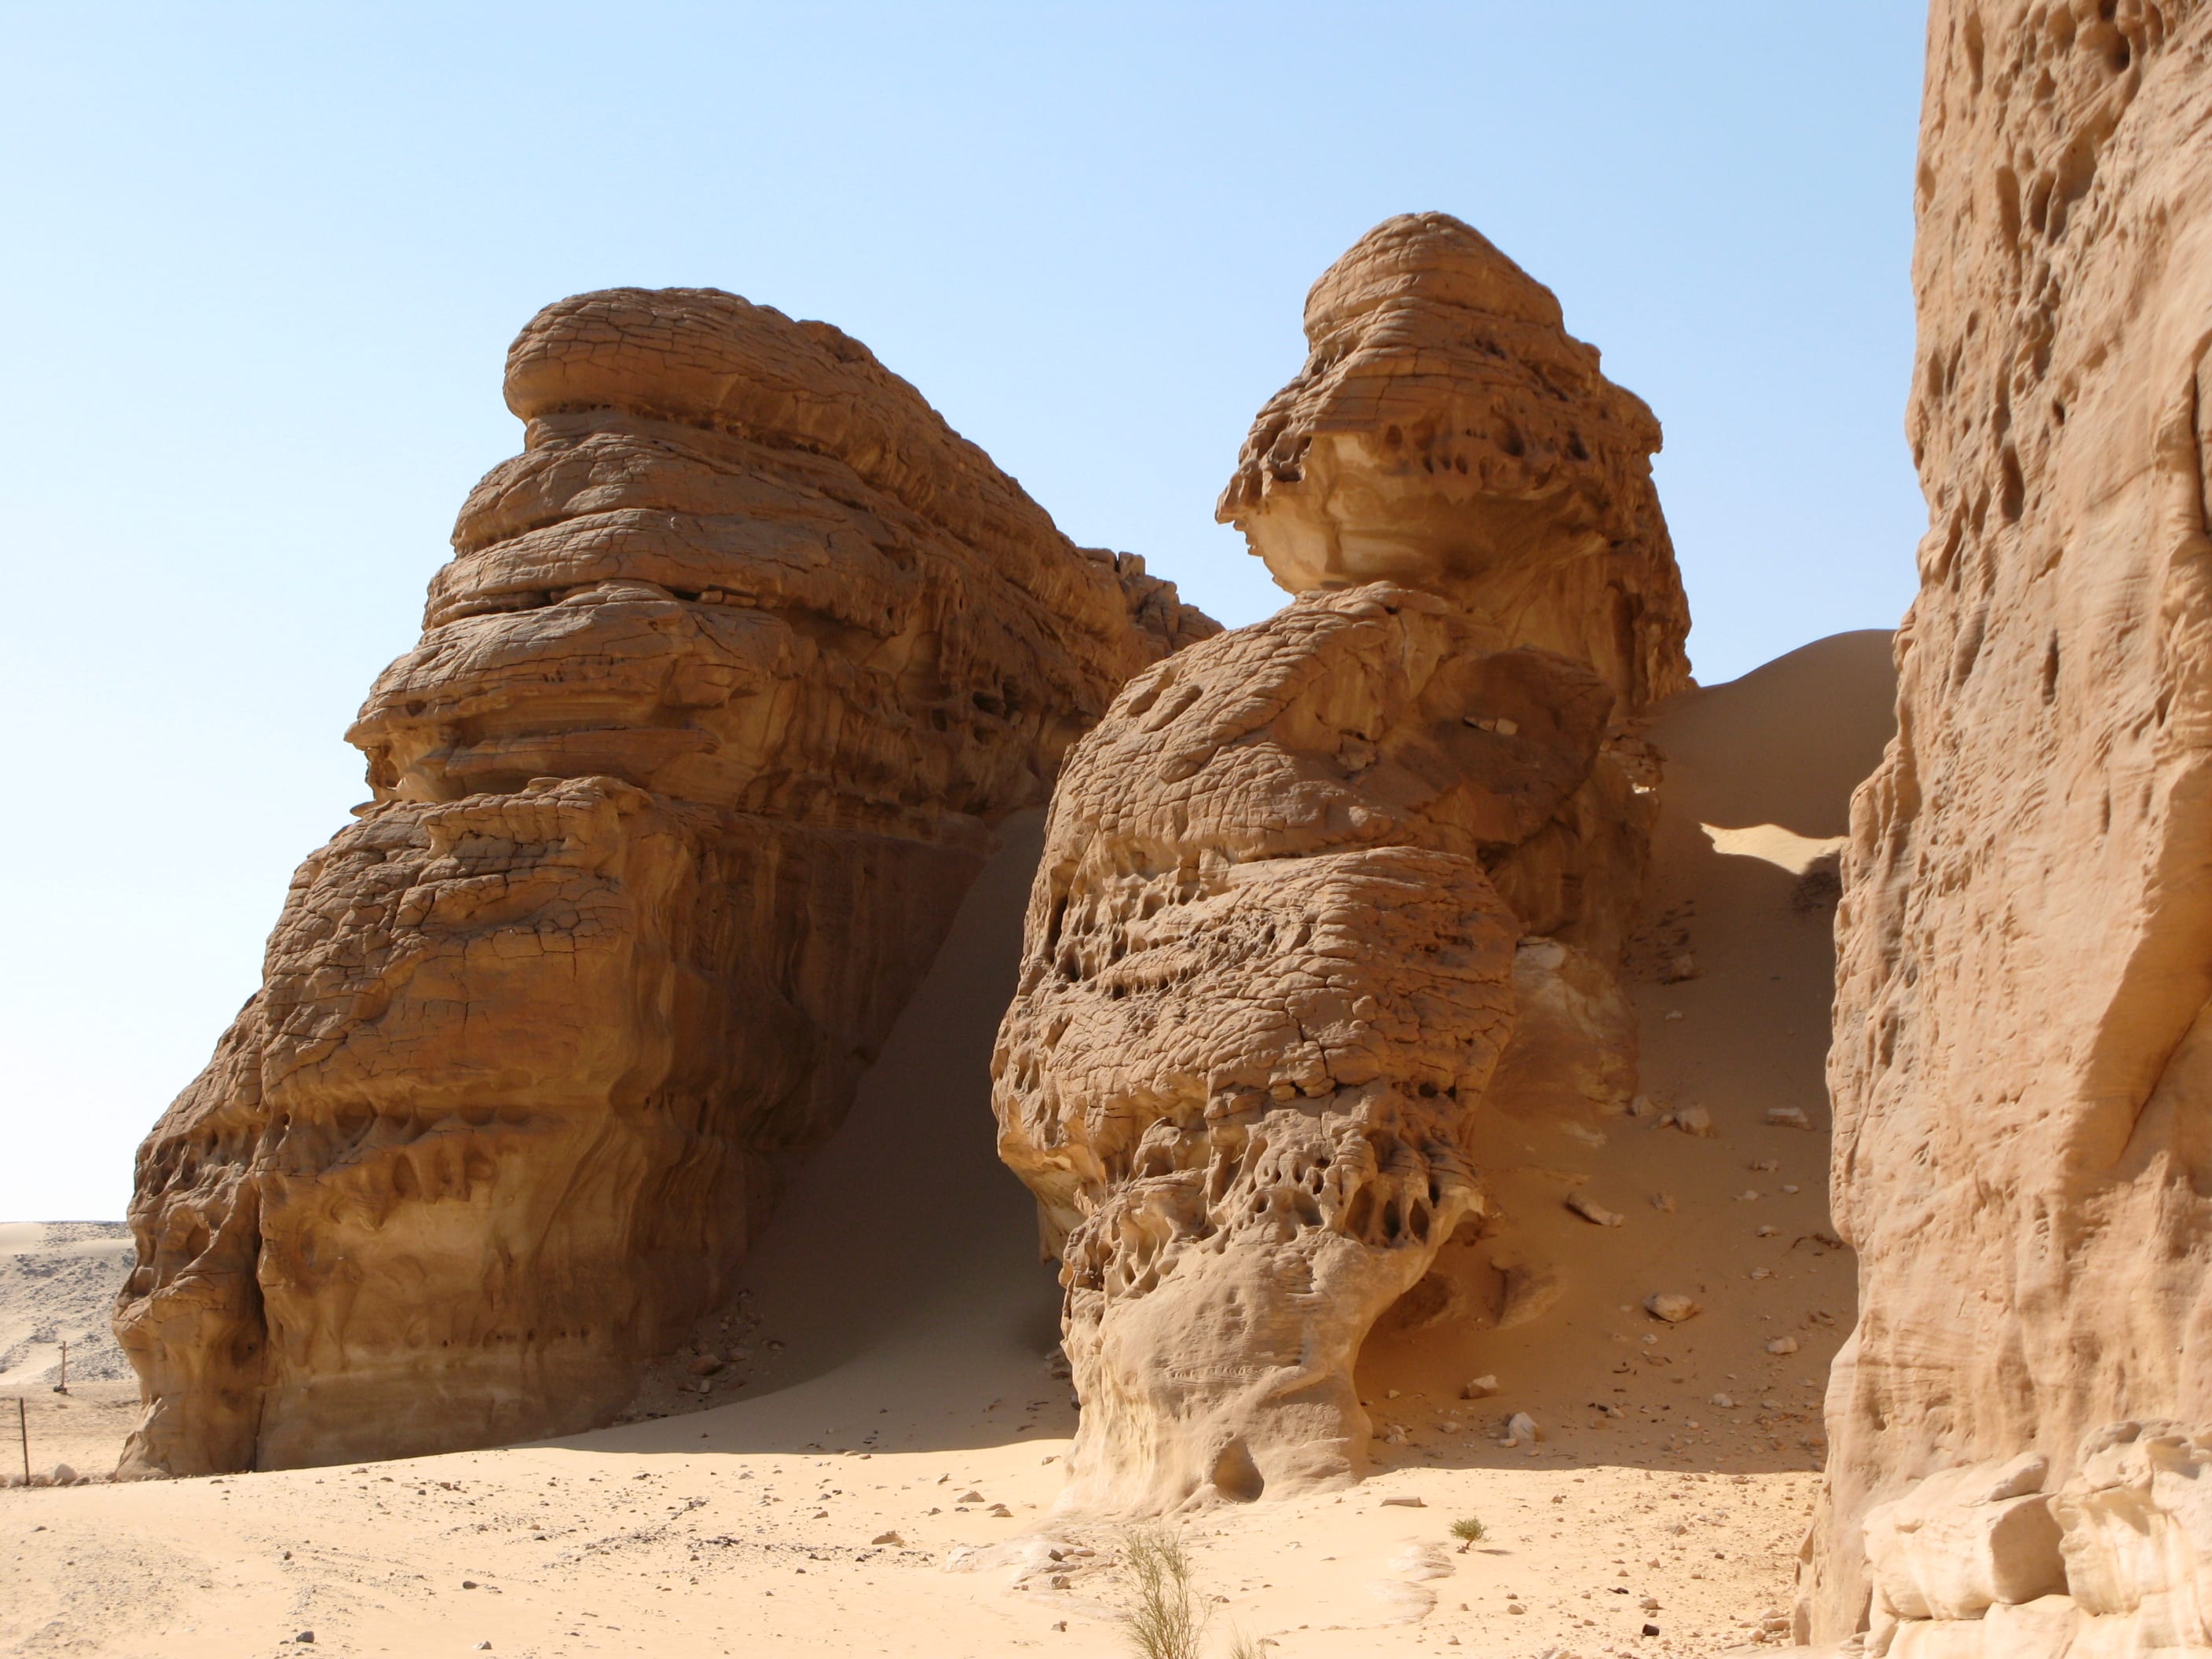
Prilfish – Desert – https://www.flickr.com/photos/silkebaron/2778696427/in/photolist-5exxD6-BhVtDE-2GGRzW-fgnpX-RSA8Mq-48n3iY-3gTuGh-8cCPed-7CFUnh-onJGa-5EYNsZ-9dtT6j-48n2Yy-oFg73-XhZgg6-q7j4qc-9ANgBi-f69c7K-7dbkzz-a4xhPN-aww9mQ-5CbDF2-6W1c9-VpC5Br-7himyA-c4wP8-49195x-6c37X1-W4R6UF-7Ww2y-5eBVJh-73WZfi-8JQ8tx-TaGwjt-U2TgFa-7STtoE-6bieHZ-5t6J8Y-7Ww3E-7SEob-rjgHJk-SoSS6V-rAWUx-7SEhT-8JT5Jh-dij4fH-gMN3bW-RPAL1X-zE5q9n-f3oU1v

Music:
Ambient Gourd by Canton – https://soundcloud.com/canton/ambient-gourd

Creating My Final Animation | Development

Using the same principles as in the image compositing research, I managed to figure out how to do the same but with an animation. I followed the tutorial uploaded by ‘TheCuriousEngine’, with the only major change being the alteration of the render settings, rendering my work as an animation rather than an image. I also set the format to an 8-bit PNG with 0% compression. I then uploaded these images as an image strip in the video editor of a new Blender file, exporting this as a H.264 video file.

0001

When I originally did this, my render outcome was not correct. The image above shows how my project was rendering, completely missing the background image and forgetting to hide the ground layer I created. I rewatched the tutorials a couple of times, and even restarted creating the project, however my outcome was still the same. I then consulted my tutor through emails and he suggested to check the following settings:

  •  Make sure that transparent is ticked in the ‘film’ tab of the render panel.
  • Make sure that both of your square shaped layer indicators are selected.
  • Make sure you have put the objects you want rendering on the correct pass index.

After checking these settings and trying again, however, the result was still the same. I shared my file with my tutor, and he managed to rectify the problem which was down to one of the above options not registering as I had expected. Once this problem was solved, I was able to correctly render a my sequence.

When consulting my tutor, he also suggested changing the following to optimise my render settings:

  • Reducing my output resolution to 1280x 720p.
  • Taking the samples down.
  • Switching demonising on. ( I thought I had already done this however I was incorrect.)
  • Use CPU rendering instead of GPU.

The original Image:

[Image Credit: Prilfish – Desert – Link]

Here is a time-lapse of me composing my final animation:

Compositing Models Into an Image | Research

A lot of my intended final outcome relies on me compositing my creation into real life environments, so a key part of my research needed to be dedicated to this subject. I had never done anything like this, so I made sure to begin with the rest of my assets completed, i.e. a chosen background image, a completed model and imported textures.

Blender Guru:

Having relied on BlenderGuru’s guidance for most of my learning process, I firstly looked to his website and youtube channel. The creature dedicated a useful post to rendering onto a photo background, including an informational video on how to do so. Although useful, the video is rather quick, and didn’t provide as many tips about how to light and create appropriate shadows for my model as I had hoped, so I searched elsewhere for help.

https://www.youtube.com/watch?time_continue=1&v=wjWoglMYXBE

The Curious Engine:

One of my tutors runs a website dedicated to presenting both his portfolio and information about 3D and special effects. One of his posts includes a playlist devoted to explaining how to effectively composite a 3D element onto an image.

‘ This is a series of videos that covers the workflow I recently used to create the ‘Tank Bot’ concept. Fundamentally, I take you through the process of:

  • Importing an image into Blender and aligning the 3D cmaera to match
  • Importing models into the project and adding textures from a PBR workflow and building a new material based on the new Principled Shader
  • Adding a Keylight and Ambient lighting to best match the lighting in the background image
  • Setting up render layers and passes as well as optimizing rendering times and quality
  • Combining foreground and shadows passes with the background image in the Nodal compositor inside Blender’ (Holmes, 2017)

I relied mostly on this informational playlist to create my final images due to the detail it goes into and the outcome it produced.


Sources:

– Blender Guru. (2017). How to Render onto a Photo Background. [online] Available at: https://www.blenderguru.com/tutorials/render-onto-photo-background [Accessed 15 Dec. 2017].

– Holmes, J. (2017). Blender | CGI & Image Compositing. [online] The Curious Engine | Digital Post Production. Available at: http://www.thecuriousengine.co.uk/?project=1954 [Accessed 15 Dec. 2017].

Animation in Blender | Research

What is Animation?

 ‘Animation is the process of making the illusion of motion and the illusion of change by means of the rapid succession of sequential images that minimally differ from each other.’

Animation can include drawings, models, or even inanimate objects. Animated motion pictures and television shows are highly popular forms of entertainment. Traditionally, animation has involved the filming of a series of cartoon drawings or objects so that, when projected, the illusion of movement is created.’ (Britannica Kids, 2017).

Animating in Blender:

Keyframes are an important thing to learn about in animation. A keyframe holds the value of a property to a specific time on a timeline, for example it could define the position an item is on its Y axis, increasing as the frames go on. Blender’s animation feature automatically predicts frames, meaning instead of having to define each frame in a scene, you can define the properties in frame 1 and then how you want them to be in frame 15, and the frames in between will be filled in appropriately. You can insert keyframes in 3D view, and move and delete any keyframe you insert by using the Dope Sheet editor window.

Dope Sheet  Dope Sheet 2

Insert Keyframe

 Blender Animation Showreel:


Sources:

– Blender. (2017). Animation — Blender Manual. [online] Available at: https://docs.blender.org/manual/en/dev/animation/index.html [Accessed 15 Dec. 2017].

– En.wikipedia.org. (2017). Animation. [online] Available at: https://en.wikipedia.org/wiki/Animation [Accessed 15 Dec.

– Britannica Kids. (2017). Animation. [online] Available at: https://kids.britannica.com/students/article/animation/604592 [Accessed 15 Dec. 2017].